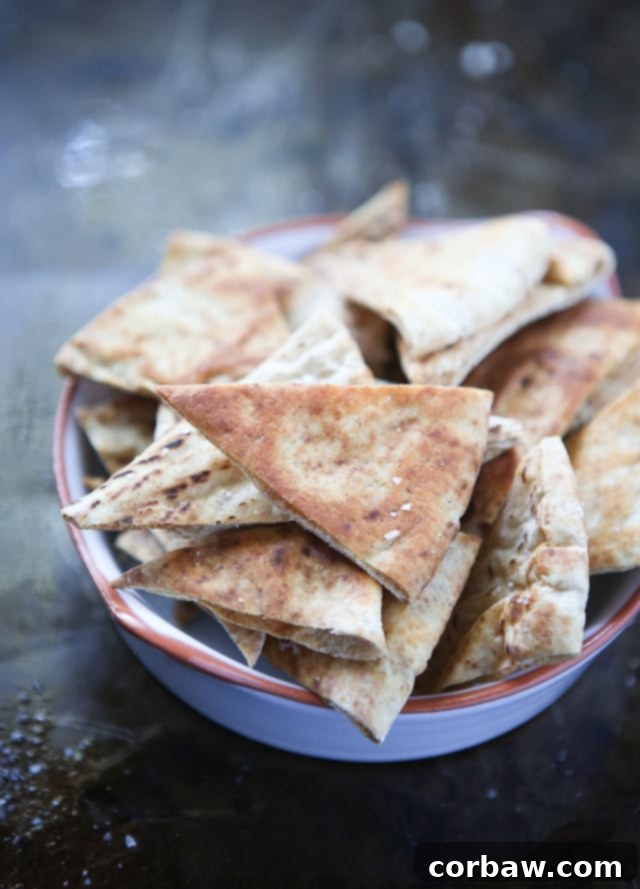
Crispy Homemade Baked Pita Chips: Your Ultimate Guide to a Healthy, Flavorful Snack
There’s truly nothing more satisfying than a fresh batch of homemade baked pita chips. Forget the store-bought versions filled with unknown ingredients; making your own is surprisingly simple, incredibly rewarding, and results in a healthier, tastier snack. My family absolutely adores these, and frankly, so do I! They are perfect for dipping, scooping, or simply enjoying on their own, offering that delightful crunch everyone craves.
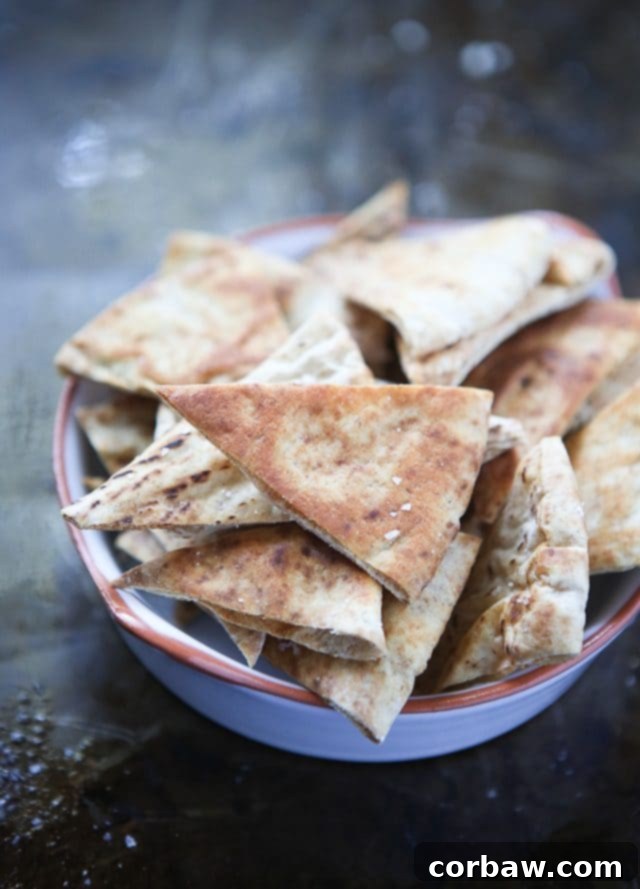
Like many of you, I have a major soft spot for any dip and chip combination. It’s a weakness I’ve learned to embrace, but also one I’ve learned to manage effectively. Over the years, I realized my willpower dramatically diminishes when confronted with a bag of store-bought pita chips – I could easily devour an entire bag with some creamy hummus in what feels like mere minutes. While not the worst indulgence, the aftermath often leaves me feeling less than stellar. This realization was my motivation to find a better, healthier way to enjoy my favorite crispy snack.
And that better way is undeniably homemade. Crafting your own baked pita chips is genuinely too easy and beneficial not to do. The unparalleled freshness and crispness simply can’t be matched by anything from a package. Plus, when I use my favorite pita rounds (which are often whole wheat or fortified with healthy grains), I feel even better about every single bite. If you’re diligently tracking your food intake for weight loss goals or general health improvements, making your own pita chips offers a fantastic, controlled option to truly savor this beloved snack without guilt. They are the perfect addition to a vibrant veggie platter, an excellent base for savory dishes, or simply ideal for scooping up a hearty dip.
Why Choose Homemade Pita Chips? The Benefits Are Endless!
Beyond the simple joy of creating something delicious in your own kitchen, there are numerous compelling reasons to opt for homemade baked pita chips instead of their store-bought counterparts:
- Healthier Alternative: Commercial pita chips often contain excessive sodium, unhealthy hydrogenated oils, and artificial preservatives. When you bake them at home, you have complete control over the type and amount of olive oil, salt, and any additional seasonings you use, making them a much lighter and more nutritious option. Choosing whole wheat pita bread further boosts the fiber content, aiding digestion and promoting satiety.
- Superior Freshness and Flavor: There’s no comparison to the taste and texture of warm, freshly baked pita chips straight from your oven. They possess a delicate, airy crispness and a fragrant aroma that packaged versions simply cannot replicate. The subtle notes of olive oil and coarse salt truly shine when the chips are fresh.
- Cost-Effective Snacking: A few packages of quality pita bread are typically much cheaper than buying multiple bags of pre-made pita chips, especially if you and your family enjoy them frequently. This makes homemade chips an economical choice for regular snacking, meal prep, or entertaining guests without breaking the bank.
- Customizable Seasonings: The world of flavor is your oyster! While classic salt and olive oil are universally loved, homemade chips provide an incredible canvas for culinary experimentation. You can easily tailor the seasonings to match your mood, the dip you’re serving, or to explore new taste profiles.
- Reduced Food Waste: Have a few pita breads nearing their expiration date? Don’t let them go to waste! Transforming them into delicious, crispy chips is a clever and sustainable way to extend the life of your pantry staples, preventing unnecessary food waste.
Selecting the Perfect Pita Bread for Baking Crispy Chips
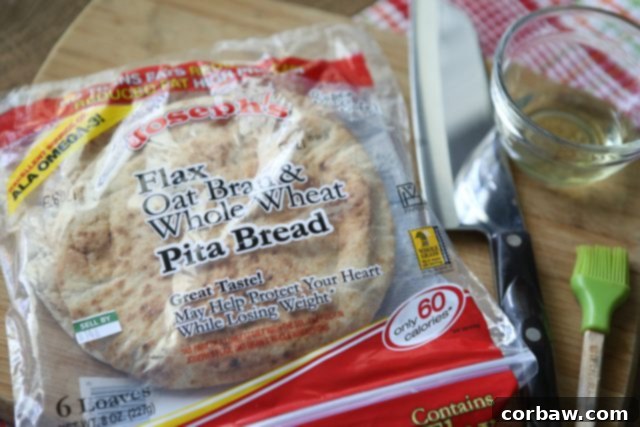
The foundation of a truly great homemade pita chip is, of course, the pita bread itself. My personal go-to is Joseph’s Bakery pita bread, often pictured above. These particular pita rounds are wonderfully soft, incredibly versatile, and made with quality ingredients like flax, oat bran, and whole wheat, making them an excellent healthier choice. While they might not be the most “authentic” in a purely traditional sense, their flavor and texture are absolutely delicious and perfectly suited for baking into delightfully crispy chips. I typically find them conveniently located in the deli section of my local grocery store (such as Publix), but you also have the convenient option to order them online if they’re not readily available near you. Their lower carb profile is a huge plus, and I often use their versatile flatbreads for quick and healthy homemade pizzas too!
When choosing your pita bread for chip-making, keep these tips in mind:
- Freshness is Key: Always ensure the pita bread is fresh, soft, and pliable, not stale or hard. Fresh pita will absorb the olive oil better and crisp up more uniformly.
- Consider Thickness: Thinner pita breads tend to crisp up better and faster than thicker, puffier varieties. If your pita is very thick, you might consider carefully splitting it in half before cutting to create thinner chips.
- Opt for Wholesome Ingredients: For added nutritional benefits, always opt for whole wheat, whole grain, or flax-oat bran varieties. These not only offer more fiber but can also impart a slightly nutty flavor that complements many dips.
How to Master Baked Pita Chips: A Simple Step-by-Step Guide
Making delicious baked pita chips is incredibly straightforward, requiring just a few simple steps and minimal ingredients. You’ll be amazed at how quickly you can whip up a batch that rivals (and surpasses!) any store-bought option.
Step 1: Preparation – Preheat Your Oven and Slice the Pita
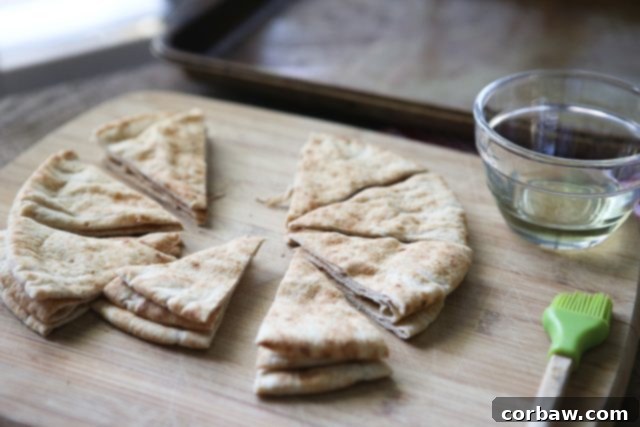
First, begin by preheating your oven to a consistent 350°F (175°C). This optimal temperature ensures the chips bake evenly and achieve that desired golden crispness without burning. While your oven is heating, take your pita bread rounds and prepare them for slicing. The easiest and most effective way to cut each pita into approximately eight uniform triangles is to start by using a sharp chef’s knife to cut it straight across in half. From there, take each half and cut it into four smaller triangles. This method ensures you get consistent sizes, which is absolutely key for even baking and uniform crispness across all your chips.
Step 2: Seasoning and Spreading on Baking Sheets
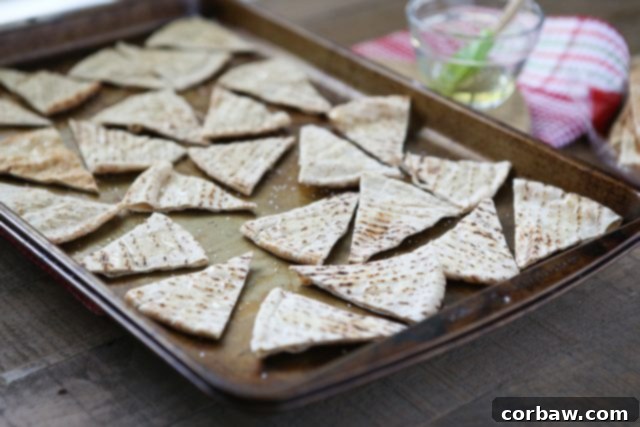
Once your pita loaves are perfectly cut into eight triangles each, arrange them in a single layer across one or two large baking sheets. It’s crucial to avoid overcrowding the sheets, as this can trap steam, preventing the chips from becoming truly crispy. If necessary, use two baking sheets to give them ample space. A small basting brush is ideal for lightly and evenly applying olive oil to both sides of each pita triangle. A thin, even coating is all you need; it helps them crisp up beautifully and provides a perfect surface for the salt and any other seasonings to adhere to. For seasoning, I generously sprinkle coarse salt (kosher salt is my go-to for almost all my cooking due to its texture and flavor) evenly over all the triangles. This is also the perfect stage to add other seasonings, as detailed in our “Flavor Variations” section below, to customize your chips.
Step 3: Baking to Golden Perfection
Carefully slide your prepared baking sheets into the preheated oven. Bake for approximately 10 to 15 minutes. It’s important to keep a close eye on them, as oven temperatures can vary, and thinner pitas will naturally cook faster. The goal is a beautiful golden-brown color and a visibly crisp texture. As they bake, the edges will start to turn golden, indicating they are almost done. Don’t worry if they still feel a little soft when you first pull them out of the oven – this is perfectly normal and expected! They will continue to crisp up significantly as they cool down on the baking sheet, transforming into that satisfying crunch we all love.
Elevate Your Snacking: Flavor Variations for Homemade Pita Chips
While classic olive oil and coarse salt are always a guaranteed hit, don’t hesitate to get creative and experiment with your pita chip seasonings. The versatility of homemade pita chips allows for endless flavor combinations to suit any palate or occasion. Here are some inspiring ideas to try for your next batch:
- Garlic & Herb: For an aromatic twist, mix a teaspoon of garlic powder and a half-teaspoon of dried oregano or Italian seasoning directly into your olive oil before brushing, or simply sprinkle them onto the chips along with the salt.
- Spicy Kick: If you enjoy a little heat, add a pinch of red pepper flakes, a dash of smoked paprika, or a touch of cayenne pepper along with the salt for a subtle yet satisfying warmth.
- Lemon Pepper Zest: For a bright and zesty flavor profile, use lemon pepper seasoning generously instead of or in addition to coarse salt. This variation is especially fantastic when paired with seafood dips or creamy, refreshing spreads.
- Authentic Za’atar Seasoning: For an undeniable Mediterranean flair, sprinkle a good amount of za’atar (a flavorful Middle Eastern spice blend typically containing toasted sesame seeds, dried thyme, oregano, and sumac) over the oiled pita triangles before baking.
- Sweet Cinnamon Sugar: For a delightful sweet treat, brush your pita triangles with melted butter (instead of olive oil) and then generously sprinkle them with a mixture of cinnamon and sugar. These sweet chips are perfect for serving with fruit salsas, yogurt parfaits, or even as a simple dessert chip.
- Parmesan Garlic Bliss: After brushing with olive oil, sprinkle with garlic powder and a generous amount of finely grated Parmesan cheese before baking. The Parmesan will crisp up beautifully, adding a salty, umami depth.
How Long Do Homemade Pita Chips Last? Essential Storage Tips
Once your delicious homemade pita chips have completely cooled down to room temperature – and this cooling process is crucial for maximum crispness – they can be stored efficiently. Place them in an airtight container or a resealable storage bag. When stored correctly, they will maintain their delightful crispness and fresh flavor for up to 3 days. For best results, avoid refrigerating them, as the moisture in the fridge can quickly make them soft and chewy. If, after a day or two, they lose a bit of their crunch, simply pop them back into a preheated 300°F (150°C) oven for 5-7 minutes. This quick refresh will help revive their crispness, making them good as new!
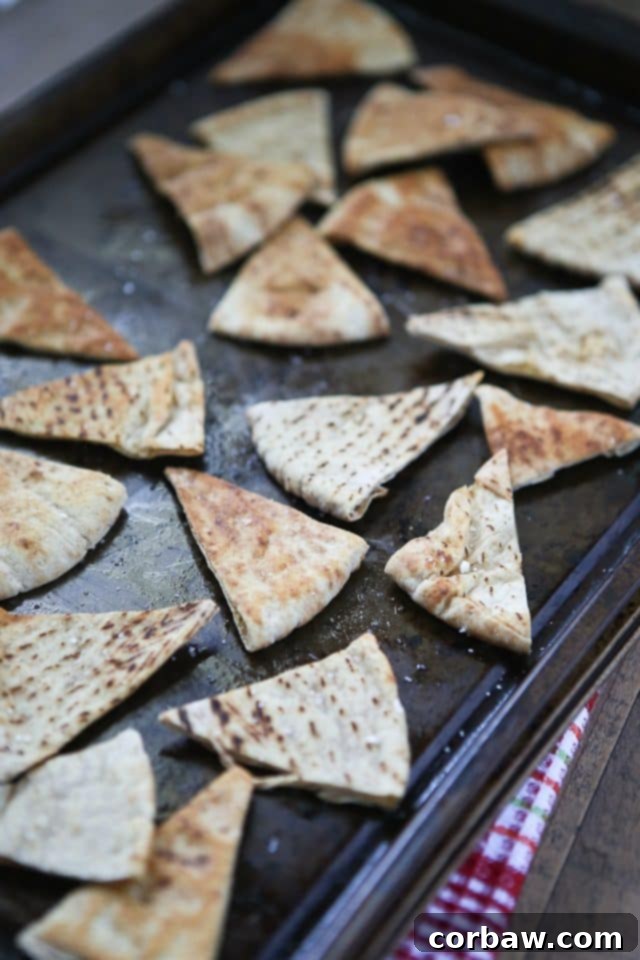
These homemade baked pita chips are truly the best you’ll ever taste. Once you’ve made them, gather your favorite dip, and get ready to dig in. Their versatility makes them an ideal companion for a wide variety of meals, snacks, and entertaining occasions.
What Goes Good With Pita Chips? Endless Pairing Possibilities!
Homemade pita chips are incredibly versatile, making them the perfect vehicle for an array of delicious dips, creamy spreads, and even as a crunchy component in more substantial meals. Their robust structure and mild flavor allow them to complement a vast spectrum of culinary creations. Here are some fantastic ideas to get you started on your dipping journey:
- Classic Mediterranean Dips: Always a crowd-pleaser! Serve them with traditional hummus (or explore variations like roasted red pepper or lemony artichoke hummus), smoky baba ghanoush, refreshing tzatziki, or various other creamy Greek yogurt-based dips.
- Rich & Creamy Spreads: Beyond the classics, homemade pita chips are excellent with a savory feta dip, a decadent spinach and artichoke dip, a vibrant roasted red pepper dip, or even a simple herbed cream cheese spread.
- Hearty Salad Companions: They make an excellent, crunchy accompaniment to fresh and hearty salads such as Greek salads, traditional fattoush (where they are a key ingredient), or even a simple garden salad, adding a delightful textural contrast.
- Lunchtime Upgrade: Elevate your lunch! Use these sturdy chips to scoop up something like this Greek Yogurt Egg Salad with Smoked Paprika for a satisfying, flavorful, and healthy midday meal.
- Vibrant Appetizer Platters: Homemade pita chips are the perfect crunchy addition to any vibrant veggie platter. Arrange them alongside fresh cucumbers, crisp carrots, colorful bell peppers, cherry tomatoes, and your favorite olives for a visually appealing and healthy spread.
- Creative Nachos: Forget traditional tortilla chips for a moment! Use homemade pita chips as a unique and delicious base for Vegetarian Mediterranean Nachos. Top them with crumbled feta cheese, Kalamata olives, diced tomatoes, thinly sliced red onion, and a drizzle of tangy tahini or a garlicky yogurt sauce for a delightful fusion dish.
For even more inspiration, check out these specific dip recipes that pair wonderfully with your homemade baked pita chips:
Kalamata Olive and Feta Dip
Cucumber and Feta Greek Yogurt Dip
Lemony Artichoke Hummus
Curry Dill Dip | RecipeGirl
White Bean and Roasted Garlic Dip | The Lemon Bowl
Artichoke Feta Dip | Mom To Mom Nutrition
Homemade Baked Pita Chips
Author: Aggie Goodman
Prep Time: 5 minutes
Cook Time: 15 minutes
Total Time: 20 minutes
Yield: 6 servings 1x
Category: Appetizers, Healthy Snacks, Mediterranean
Method: Oven Baking
Experience the unmatched flavor and crunch of homemade baked pita chips! This easy recipe allows you to create perfectly crispy, healthier pita chips at home, ideal for serving with your favorite dips, salads, or as a delightful snack on their own. Simple ingredients and minimal effort yield maximum deliciousness for a perfect appetizer or healthy bite.
Ingredients
- 6–8 pita rounds, preferably whole wheat or flax-oat bran, cut into 8 triangles each
- 2-3 tablespoons extra virgin olive oil, for brushing (or more as needed)
- 1 teaspoon coarse salt (such as kosher salt or sea salt), or to taste
- Optional Seasonings: 1/2 teaspoon lemon pepper seasoning, garlic powder, onion powder, smoked paprika, za’atar, or your preferred spice blend
Instructions
- Preheat Oven & Prepare Pita: Preheat your oven to 350 degrees F (175 degrees C). While the oven heats, take each pita round and cut it into 8 even triangles. The easiest way is to cut the pita in half, then cut each half into 4 triangles, ensuring uniform size for even baking.
- Arrange & Season: Spread the pita triangles in a single layer on one or two large baking sheets, making sure they are not overcrowded. Overcrowding can lead to steaming instead of crisping. Lightly brush extra virgin olive oil on both sides of each pita triangle using a basting brush. Sprinkle evenly with coarse salt and any desired optional seasonings (e.g., lemon pepper, garlic powder, za’atar).
- Bake to Crisp: Place the prepared baking sheets in the preheated oven. Bake for 10-15 minutes, or until the pita chips are beautifully golden brown and visibly crisp. Keep a close watch, as baking times can vary depending on your oven and pita thickness.
- Cool & Serve: Remove the baking sheets from the oven and let the pita chips cool completely on the sheets. They will continue to crisp up significantly as they cool down, achieving that perfect crunch. Serve immediately with your favorite dips, spreads, or enjoy as a healthy snack. Store any leftovers in an airtight container.
Notes
- For best results, use a silicone basting brush to ensure an even, thin coat of olive oil on your pita triangles.
- Do not overcrowd the baking sheet; this is essential for proper air circulation and prevents the pita from steaming instead of crisping. Use two sheets if necessary.
- Pita chips are still typically a little soft when they first come out of the oven, but they will become perfectly crisp as they cool to room temperature.
- Experiment with different spices like za’atar, smoked paprika, dried oregano, or even a touch of chili powder for varied and exciting flavors.
- To refresh stale pita chips, simply pop them back into a 300°F (150°C) oven for 5-7 minutes until crispy again.
